Okay, so I thought I'd post this tutorial a few days ago. Why not you ask? Because I had a major craft fail on this one and had to rethink the project. So here goes the story...
I've been itching to do a project using these fish prints from Oceania and Samoa I found. The images are from 1906. For the background, I used a flourished pen image from The Graphics Fairy. I was thinking of using an encyclopedia page or newsprint background, but I surprised how the script became so graphic and abstract when blown up on my computer.
For this project, I'm using some 5"x5" canvases I had lying around {shown below}. I had painted them blue, then green, then back to the nice white shown {that's what causes my craft fail, so heed my warning and just use untouched canvases for this project}. {Tip: if you're buying canvases that are stapled, look for staples on the BACK of the frame. There are some inexpensive versions that staple on the edges --- unless it's going in a frame or you cover the sides, you'll see the staples}.

{1} First, scan in your image or find and save your copyright free image to your computer. Open that file in your graphics editing program and remove the background, making it transparent {everything except for the fish}. {see below} {I'm posting the specific instructions for how I create transparent images in Adobe tomorrow if you need that info. {CLICK HERE}}

{2} In a graphics program, as shown below, layer your transparent graphic on top of the Graphics Fairy flourished pen image. {You obviously need to take in to account the size of your canvas. Just account for the canvas top, not the sides, I'll explain why later}. When you're happy with the results, print the image out on Avery t-shirt transfer paper {shown below}. {Tip: I use the kind for light t-shirts which is a clear background instead of a white background}.


{3} Cut out your transfer to size.

Now here's the craft FAIL: I'd seen a technique on Pinterest where the person used the same transfer sheets I'm using and ironed them on the canvas. She however had NOT painted the canvas. So after I applied pressure and ironed....THE PAINT MELTED! The smell was terrible and it looked even worse. After shouting a few "wow, really? really?" 's I took a deep breath and decided to regroup...


{4} So then I cut out some scrap fabric {enough to cover the front and wrap around the sides}.

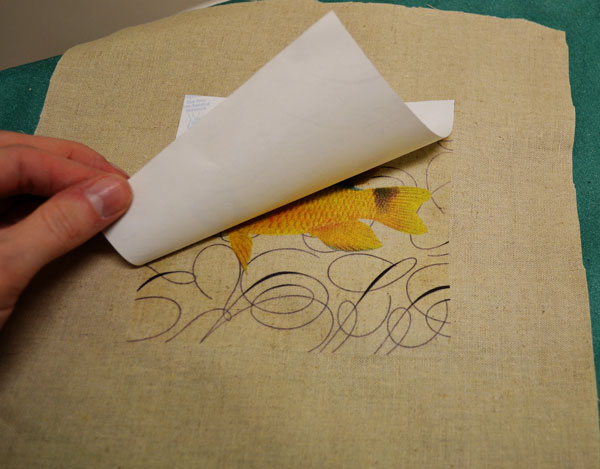
{5} Put the transfer face down & center it. Iron according to the directions. Gently peel back the transfer paper {shown below}. {Tip: it's best to wait a few seconds after ironing before trying to pull off the transfer paper backing. If you pull when the paper is very hot, the transfer may not adhere to the fabric or the paper backing and you'll have trouble getting it to stick back down}.

{6} Wrap the fabric around the canvas. I used matte Mod Podge to glue it down. I also used the matte Podge over the front transfer part too. {You know how I said make sure your image transfer only fits the top of the canvas, not the sides too? Well I'm glad I did it this way, because it was MUCH easier to wet the fabric sides with glue and apply pressure with my fingers than deal with a more rigid transfer on the sides and try to fold that down}.

{7} I then let my canvases air dry on top of a cup. Notice how they look wrinkly on the surface? I thought I had another craft fail on my hands!!! Thankfully when they fully dried the front dried without wrinkles!

Here is a closeup of four of the canvases. I love how the vintage script looks so abstract. It was hard to remember that they were actually script letters and not some cool pattern. The fish really seem to pop. I can't believe that these fish were from 1906 --- not that I didn't think they had color back then, but I guess I didn't think they used such vibrant colors in their fish studies.

Here are my five finished canvases!

Thanks for stopping by!
I'm linking this project up to: